What are Events?
An event is a moment when a specific reaction occurs.
Reactions to an event are configured through slots available in that event by creating connections between the slots of other elements.
Each event contains:
- zero or more input slots (on the left side) that modify the event’s behavior,
- at least one output slot (on the right side) that triggers connected actions when the event is activated.
Available event types:
- Event – a standard manually activated event.
- Timer Event – a time-based event.
- Stop All Tracks Event – an event that stops all currently playing tracks.
Event (Standard Event)
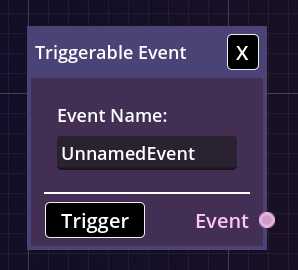
Fig. 1 – Standard event.
- This event is triggered manually.
- It can be activated from the editor or playlist view using the “trigger” button.
- It must be connected to other elements.
- It’s good practice to give it a meaningful name describing its purpose.
Timer Event (Time-Based Event)
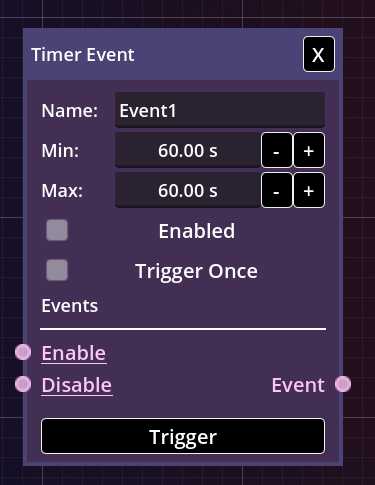
Fig. 2 – Timer event.
- This event is triggered cyclically at time intervals.
- Min – defines the minimum number of seconds to wait.
- Max – defines the maximum number of seconds to wait.
- Enabled – when checked, the event is active and waiting for its next trigger.
- Trigger Once – when checked, the event runs only once and then disables itself.
- Enable (input slot) – turns the event on so it starts triggering cyclically.
- Disable (input slot) – turns the event off, preventing it from triggering again.
The activation time is randomized between the Min and Max values. To make the event trigger at a fixed interval, set both values to the same number.
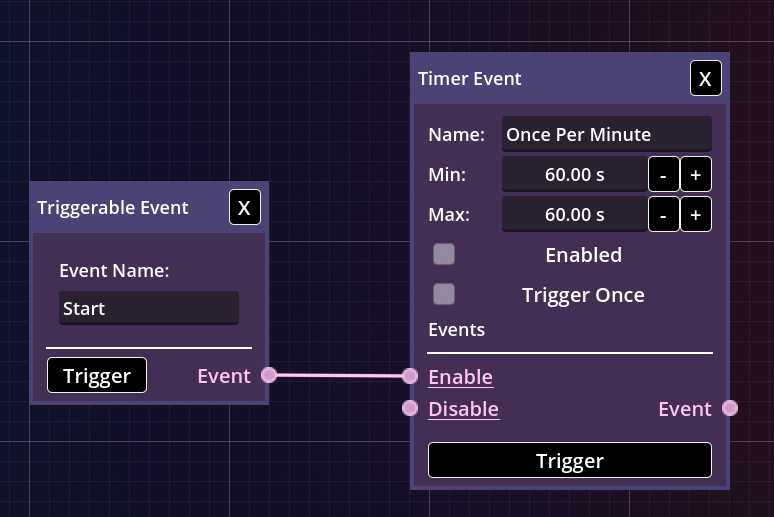
Fig. 3 – Activating a timer event.
Stop All Tracks Event
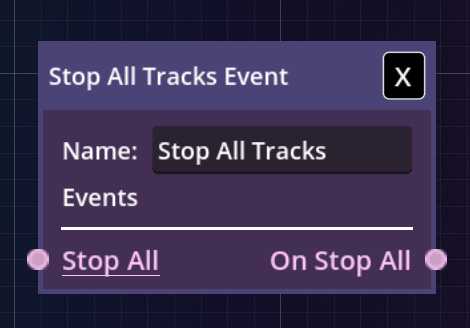
Fig. 4 – Stop All Tracks event.
- This event can be triggered manually or through an input slot.
- Stop All (input slot) – stops all currently playing tracks.
- On Stop All (output slot) – activates when the “Stop All” event is triggered.
This event can be used to stop all tracks at once without needing direct connections to each of them.
Connecting with other elements
Events can be connected to other events, for example, track events, using slots.
As a rule of thumb: if slots share the same color (e.g., pink), they can be connected.
This allows for endless creative combinations!
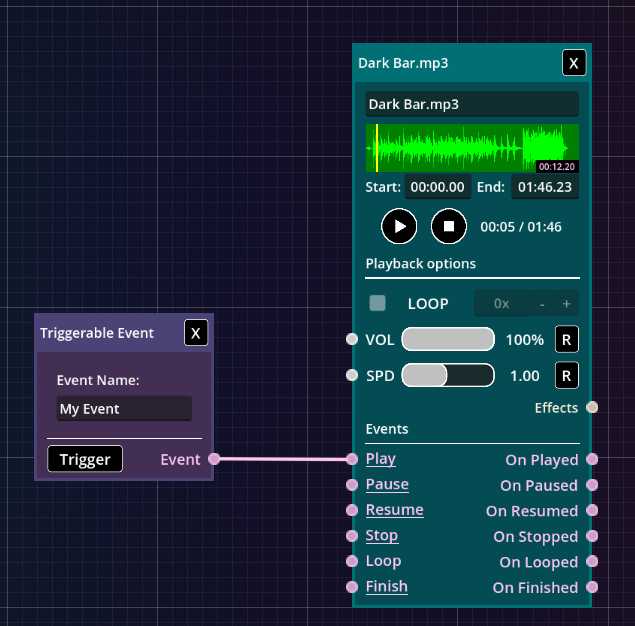
Fig. 5 – Connection between an event and a track.
Examples
You can find many examples of using events and controllers on our blog.
Visit it to see how they can be used creatively in practice and how they help build smooth, dynamic sound scenes.