What are Controllers?
Controllers are elements that automatically control track parameters.
By reacting to events, they allow for automated changes of parameters such as volume or speed.
Each controller has one or more output slots that can be connected to track parameters.
Available controller types:
- Fixed Value – sets a specific value over a given time.
- Randomizer – generates a random value within a specified range.
- Fade In/Out – gradually increases and decreases the track’s volume.
- Crossfade – enables smooth transitions between groups of tracks.
How do Controllers work?
Controllers automatically manage a track’s parameters (such as volume or speed).
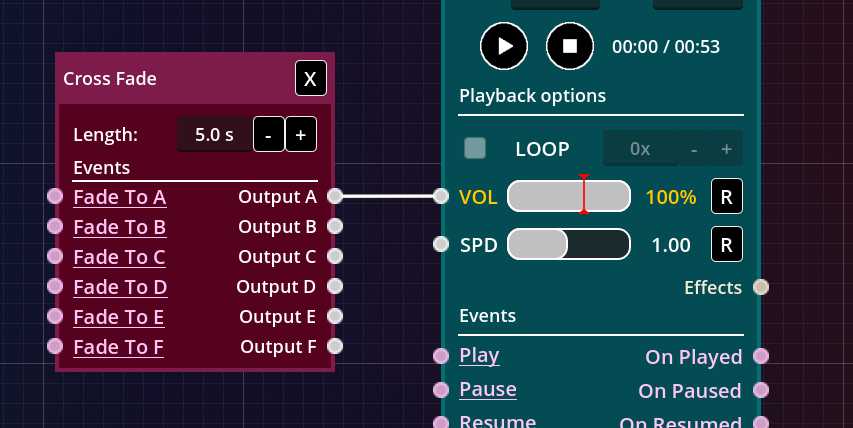
Fig. 1 – Controller connected to a track parameter.
Fixed Value
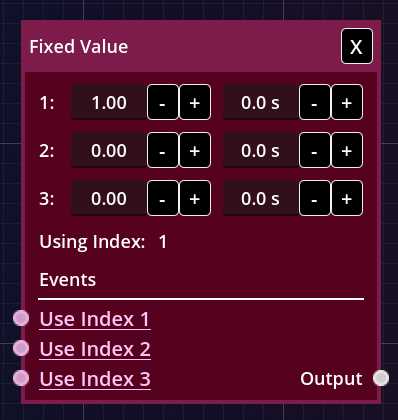
Fig. 2 – Fixed Value controller.
The Fixed Value controller allows quick switching between several predefined values.
Each row (index) defines a value and the time it takes to reach it.
- 1, 2, 3… – indexes with fields for value (0.0–2.0) and transition time (in seconds).
- Using index – the currently active index number.
- Use Index 1/2/3 (input slots) – switches to the selected index.
This lets you quickly change volume or playback speed depending on the situation during your session.
Randomizer

Fig. 3 – Randomizer controller.
The Randomizer controller generates random values within a defined range.
It can be configured to randomize continuously or only once.
- Min – minimum possible value.
- Max – maximum possible value.
- Continuous – if checked, the controller randomizes periodically.
- Delta – time interval (in seconds) between randomizations.
- Randomize (input slot) – triggers an immediate randomization.
The Randomizer is perfect for introducing subtle unpredictability — such as slight fluctuations in volume or tempo that make playback sound more natural and “alive.”
Crossfade
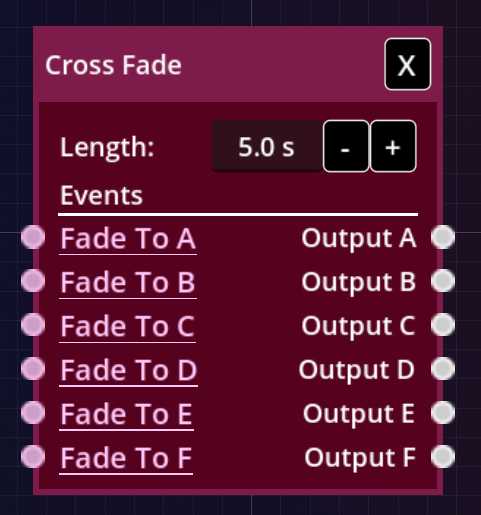
Fig. 5 – Crossfade controller.
The Crossfade controller enables smooth transitions between multiple track groups.
It has several output slots (A, B, C…), allowing transitions between sets of tracks.
You can connect multiple tracks to each output slot to form a group.
When transitioning, the selected group fades in while others fade out, ensuring smooth and nearly seamless musical changes.
- Length – duration of the transition (in seconds).
- Fade to A, B, C… (input slots) – when triggered, transitions to the chosen group while fading out others.
Examples
Many examples of using events and controllers are described on our blog.
Visit it to see how they can be creatively used in practice and how they help build smooth, dynamic sound scenes.